Oatmeal Raisin Cookies Recipe

This is a simple recipe for classic chewy oatmeal raisin cookies. This will become a family favorite you’ll make year after year.
This is a simple recipe for classic chewy oatmeal raisin cookies. This will become a family favorite you’ll make year after year.
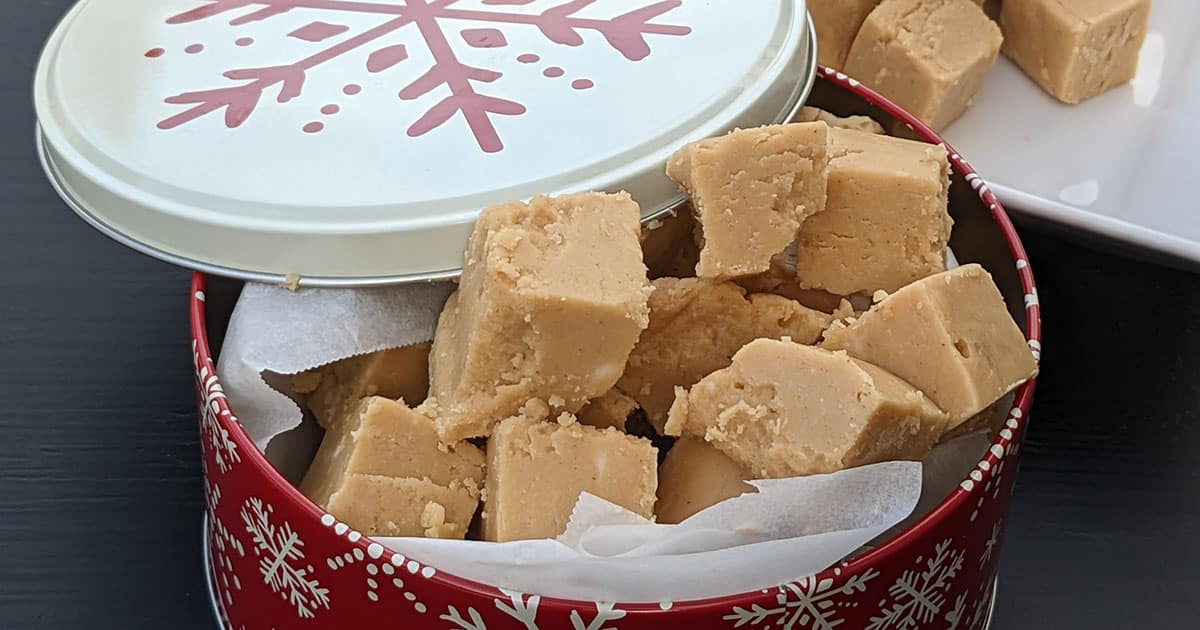
Updated 2022, Originally published December 2008 I almost wish I hadn’t updated this microwave peanut butter fudge recipe. Why? It’s dangerously easy. I don’t mean it’s dangerous in that you’ll hurt yourself making it. I mean that it’s too easy to make when you are hunting for a snack and in the mood for something …

Heather says: I was recently thinking about ways to incorporate Nutella into every day? (Kidding, but what day isn’t improved with a spoonful or pretzel-ful of this stuff?) Why not use Nutella in my favorite cookie of all time? If the Santa Claus in your household is a fan of Nutella and a fan of …
Michele says: I’m sure most of you would agree with me if I said that nothing is tastier than an ice cream sandwich on a hot summer’s day. It’s cold, it’s creamy, and it conjures up memories of childhood summers spent chasing down the ice cream man. Despite its deliciousness, however, I’m often wishing for …
Dear Home-Ec 101, I have made good lemon cake. Problem is it’s too sour. Any sauce I can use that complements lemon cake? I am from South Africa. Thank you. Signed, Tart in Tembisa Heather says: Thank you for writing in, I love hearing from Home-Eccers all over the world. I have a good …
Bobbie says: Buttery, crunchy, goodness topped with chocolate and nuts. What’s not to love? Not much, in my mind, even without the chocolate. Toffee is an excellent example of the whole being greater than the sum of the parts. Greater, delicious-er, abundantly gift-worthy and not too difficult to master. The hardest part about candy making …
Heather says: In the past I did a Sweets for the Season series with many Christmas treat recipes, but this year I just didn’t have time. So, here is a quick round up of all the cookie, biscotti, and other possible Christmas treat recipes here on Home-Ec 101. Some of these old posts are in …
Heather says: What’s your favorite cookie? Mine is the very simple chocolate biscotti. I prefer this recipe without the chocolate chips and with the walnuts, but since I was making it for the family, they got it their way. Biscotti is actually an ancient technique for making food fit for travel. Consequently biscotti is suitable …
Heather says: I’m out of town, getting my geek on at a the Type-A Mom Blog Conference. Patrick Stuckart, an excellent photographer and all around cool guy (don’t let him say otherwise), volunteered to write this post on his meringue making adventure. As I occasionally try to engage the brain cells I still have, I …
Fearless Fridays are all about pushing boundaries in the kitchen. It’s trying new techniques, recipes, or ingredients. Sometimes it works, sometimes it doesn’t. All of you are welcome to share your recent kitchen adventures either in the link list or by sharing in the comments. A lot of people forget that cooking is a skill …