 Ivy says:
My kids constantly tease me about how many purses I own. Yes, I own a few. Okay, a few too many. And now that I know how to make a lined bag, I probably will own more than a few too many. But, I’ll make them for other people and give some away as well, so I figure it all works out, somehow.
This is the most basic lined bag. It has no pockets, and is extremely easy and fast to make. You can customize the pattern to whatever size you would like, from tiny to huge. My daughter wanted a tote bag to carry to school, so I made her this:
 Nifty, eh?
This project is good for the beginning sewer. It could even serve as a first sewing project.
Time needed to complete project:
As an intermediate sewer, this project took about 2 and a half hours to complete.
Skills Emphasized:
These are the skills you will use when making this project. It will help you learn:
- Basic pattern making
- Machine sewing
- Sewing straight lines
- Sewing corners
- Topstitching
Materials Needed:

This project is rated inexpensive-medium expensive. Depending on what sort of material you use, you could spend very little, or a fairly decent chunk of money. My cost of materials for the project as shown was $6. I bought remnants on sale to save money.
- 1/2 yard of outer fabric (because you need a half yard or less of material, you can check the remnant bins to save big)
- 1/2 yard of lining fabric
- Thread (I used white)
- Large piece of paper to make pattern (newspaper end rolls are perfect for this)
- Yardstick or ruler
- Scissors, or rotary cutter and rotary cutting mat
- Pins
- Sewing machine
Click the jump for the full tutorial:
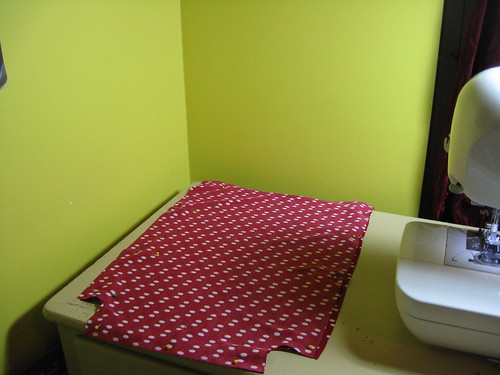
First, you will need to decide how large you want your bag and what sort of shape you would like it to be. Since this is for my daughter to carry books to school, I measured the largest book she regularly carries and added a few inches for the width and about 5 inches for the length.
I am a total nerd and failed to take a picture of making the pattern, so you’ll have to do some imagining for a second here. Don’t worry, there is a picture of the pattern coming up in a few so you can see what it looks like.
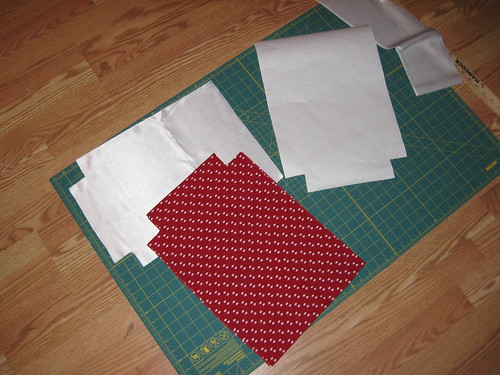
First, I cut a rectangle measuring 20 inches long by 13 inches wide. Then, I cut out squares at the bottom of each side of the rectangle measuring an inch and a half by an inch and a half. The rectangles will determine how much space there is in the bag from front to back, so make the squares larger if you want the bag to be roomier. I wouldn’t suggest making the squares any smaller than an inch square.
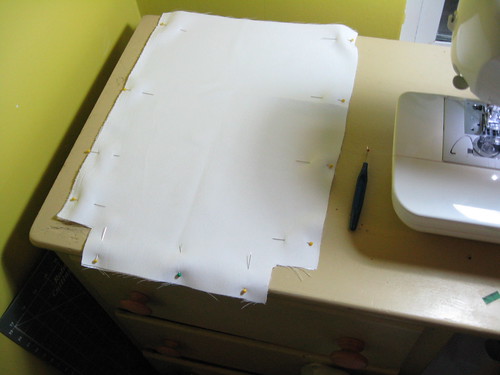
Then, I pinned the pattern to each material and cut it out. Then, I cut a long, thin strip with the lining material that was 5 inches wide and the entire length of the material. It all depends on how long you want your strap to be, really. And here’s what I ended up with:
Easy peasy. Now, it’s my very most unfavorite time of all, ironing. Incidentally, you should wash and iron your fabric before you get started on any project. But, you knew that, right? Right.
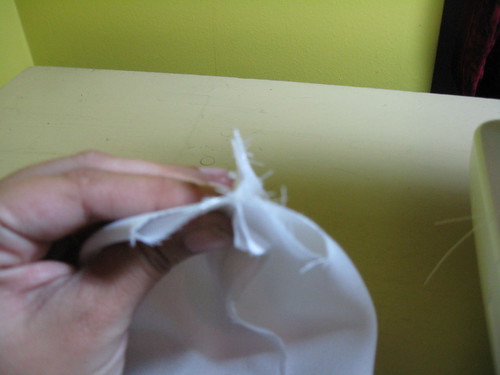
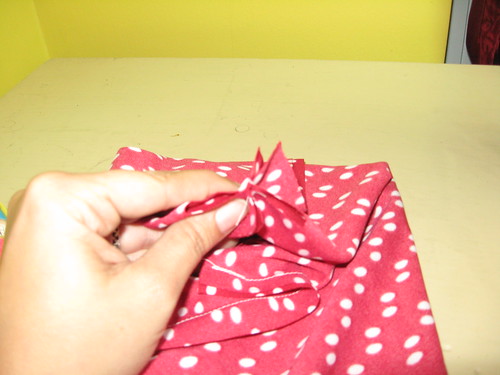
So, fold your long strip of material for the strap in half the long way. Iron a crease in that dude, and then turn both sides to the inside so you end up with a fabric burrito like this:
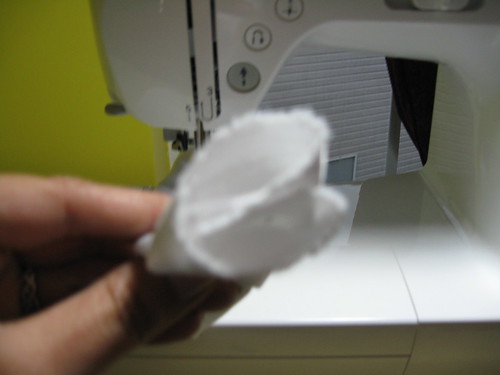 I know, blurry.
Sorry about the blurriness, I’m still trying to figure out how to make my camera make the close-up stuff be not-blurry and the far away stuff be blurry if it wants to. Still, I think you get the picture, heh.
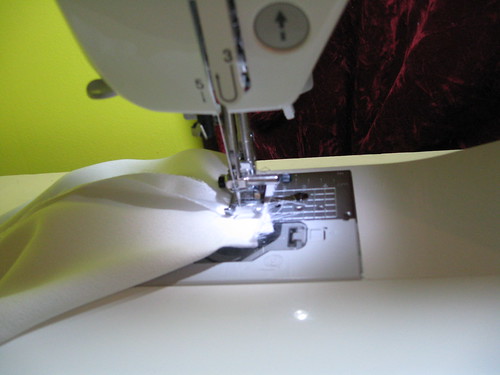
Pin that sucker, and now it’s time for the very best part, sewing. Starting with the open side, sew the strap about an eighth of an inch away from the edge, like so:
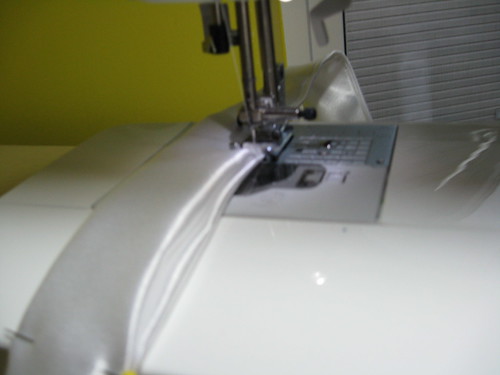
Then flip it around and do the other side the same way:
 Voila! A strap!
I highly suggest doing the strap first. First, because it’s the biggest pain of this entire project. Second, because it’s very easy to forget the strap altogether, and you can’t have a strapless bag, n’cest pas?
Now, we’ll sew the bag part. Fun for all. I always start with sewing the lining. There’s really no reason for that, that’s just how I do it. If you want to sew the outer part first, have at it. It really makes no difference. So, sew up three sides of the bag. Take a gander at this picture- you’ll sew where it’s pinned, right sides together, wrong side facing out. Leave the top and squares open.
Oh, yeah, I guess you’ll want to pin FIRST, then sew, using a half inch seam allowance:

Actually try to sew straight. I don’t know why I took such a janky picture- I swear I sewed this straight. Now that you have all three sides sewn, you’ll pinch the square closed, matching your seams like this:
Theoretically, you’ll want to pin this. Because I am a rebel, I don’t bother with pins here, I just sew like this:
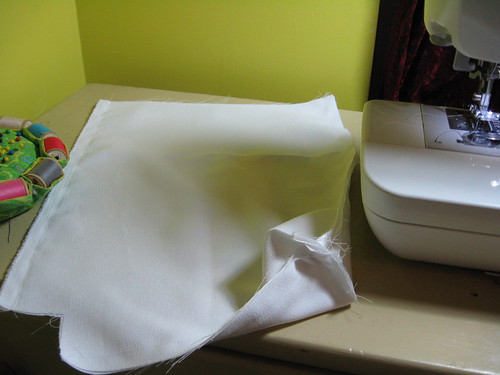
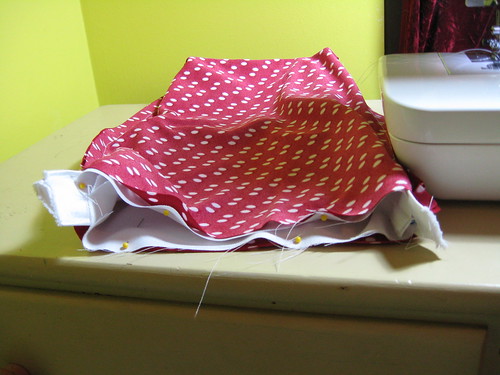
Be sure you get all the way from edge to edge. I usually go ahead and sew off the material to make entirely sure I got the hole entirely closed. Leave one of the lining material’s squares open, as you’ll need a hole to pull your amazing magic trick in a few minutes. Your lining material should look something like this at this point:
Now, to sew the outer material. Second verse, same as the first. Seriously, this is the exact same thing you did before except you’ll sew both corners closed. Here’s a quick picture run-through of what you’ll do.
Pin the dude together, right sides together, wrong side facing out:
Sew up the three sides. Pinch the square corners together, same as you did with the lining material:
And, sew both corners closed like so:

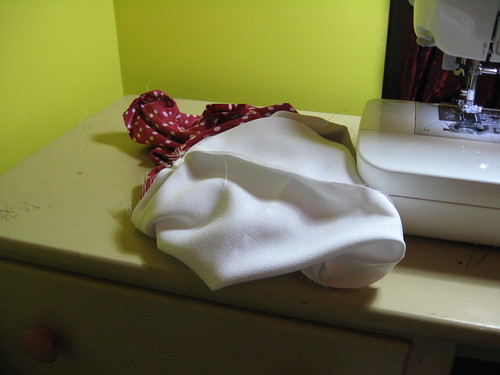
Okay. Now here comes the part that’s a little hard to show in pictures. First, grab your strap. While making absolutely sure it’s not twisty in any way, pin it to the seam on each side of the outer material, on the good side of the material. Then turn your lining material inside out so that the right side is facing out, and put it inside the outer material, and pin. It should look something like this:
Except, make your life a little easier and put all your pins on the OUTSIDE of the bag, not the INSIDE like I did. I always get that wrong, I have no idea why. Pinning is clearly not my forte.
Now, just sew along the top of the bag, using a half inch seam allowance. Now, it’s magic trick time. Reach inside the hole you left and pull the entire bag inside out. Like this:

And this:
I don’t know why I took two shots of the turning inside out and then uploaded them both, other than the fact that turning the bag inside out is my very favorite part. It really is like a magic trick. Pull it inside out and voila! You have a bag. But there are just a couple more things to do before it’s finished.
First, turn the edges to the inside of the hole you left and sew that up like so:

Then, the final step, unless you’re adding a button- topstitch the top edge all the way around, like this:
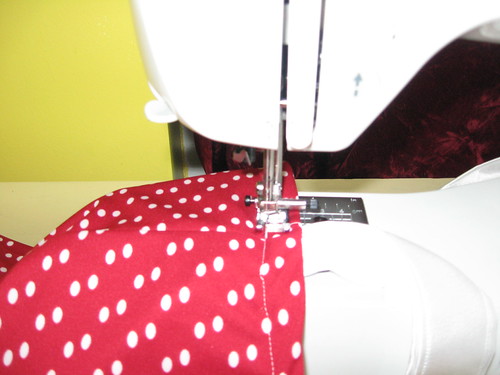
I sewed two lines of stitching to make it pretty. The first line I did a half inch in and the second line I did a quarter inch in. And that’s all you have to do, here’s the bag finished:
Enjoy your bag!

It really depends on what type of camera you are using, but most of the “point-and-shoot” digital cameras have what is called a macro setting. It should look like a flower. If you use that, you’ll get less blurry close up pictures. 😀
Hugs,
Melinda
P.S. Thanks for the tutorial. Just one more thing on my long list of things to sew sometime in the next year.
You have amazing nails.
Awesome! Thanks! I bet this would be great for shopping/grocery bags as well.
that is nice I`m going to start sewing again,i haven`t sewed in a while,thanks for the inspiration,i use to make blue jean purses,yep &can still.
Cute project, especially for a little girl. Lazy me, I just use the gazillion gimme tote bags I’ve accumulated over the years. ;o)
I cut cardboard out of boxes that are going to be discarded to fit in the bottoms of bags like this, and then cover the cardboard with contact paper (good way to use up scraps and ends of rolls). A nice solid bottom makes the bag a lot more stable.
Yay! I’d love to see more sewing tutorials on HE101.
I made a bunch of (unlined) gift bags for christmas giving this year. My quick and dirty method of making the bags wide at the bottom was to sew each side together to make a bag and then fold the corner into sort of a triangle shape (seam in the middle) and sew 2″ in, straight across edge to edge, and cut off the excess fabric. I’m not sure it’d work in a lined bag, but it was really fast and easy for unlined ones.
Nice job, Ivy! It’s a great basic bag shape and can be made in all kinds of fabric and sizes for beach bags, or grocery bags, or totes for music books and the flute for carrying to lessons, etc.
I made several similar to this, but with a pocket on the outside, and with 2 handles from the mid-bag — for my mother’s walker (it velcros on to the support frame. ) I did them in Thanksgiving, Christmas, and winter fabrics. Next: Valentines Day, St. Patrick’s, and Easter fabrics. She loves them and they dress up her walker, a hated object, into a fashion statement!
Quick, easy, and so practical!
I’m late on reading this article, but I’m glad I finally found it. This would be so cool to use as gifts for gifts! I’m thinking birthdays and xmas, like one of the ladies above commented on. I’d also like to try this in denim with a heavier strap; perhaps corded.
Thanks Ivy! Oh and I agree with Kathy…awesome nails.
Great stuff. Going to get my Daughter started on this today.
New sewer here, so color me clueless! When you pin the strap to the outer fabric, do you tuck it inside the bag and sew it when you sew the lining? And then when you turn it right side out the straps come out the hole, too? (am I making sense?) I'm trying to picture this in my head and I just can't!!! LOL
Gina- yep. you tuck it all in there and it comes right out when you pull it through the hole. Just sew it all together at once. Hope this helps, I know it's a little hard to picture before you've done it!
Okay, Ivy – here I am over two years later…I’ve made this bag a million times. Okay, not really a million, but several. It is my favorite project and every time I see new, cute fabric at Hobby Lobby I think, “Oooh, I need a cute new tote bag.” LOL 🙂 Actually, we’re making them for birthday gifts for all my DD’s friends this year. And, well, I couldn’t resist the grey & yellow floral print with yellow chevron lining…